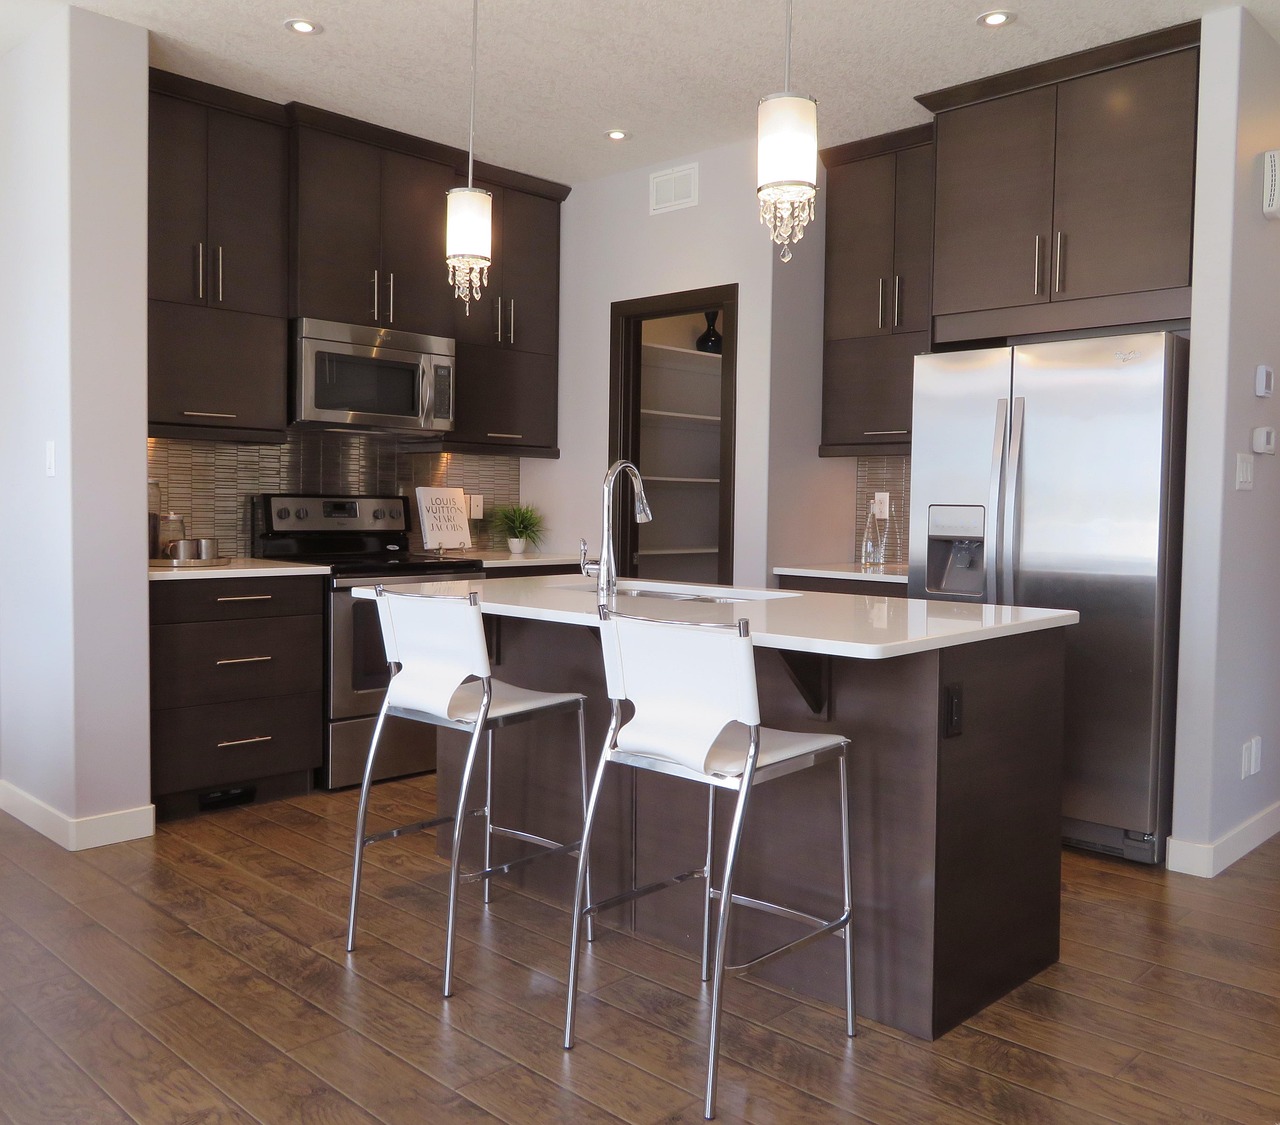
Carlsbad Kitchen Review is a local resource covering kitchen remodeling in Carlsbad, CA. The guides below explain materials, typical costs, local considerations, and how the work is usually done.
It is seven in the morning in late May. Outside a kitchen in Carlsbad, the sky is a flat sheet of gray that will not lift until close to lunch, and the window over the sink lets in a soft, colorless light that barely reaches the counter. Twelve hours later the same room is hit by a hard orange glow as the sun drops toward the Pacific Ocean. Few places ask a kitchen to handle two such different moods in one day, and that swing is the real reason lighting deserves careful thought during a remodel here.
What the Marine Layer Does to Daylight Indoors
The low cloud deck that rolls in off the ocean is a regular feature of the Mediterranean climate along the North County coast. Locals call the late spring stretch May Gray and the early summer stretch June Gloom. During those weeks, mornings are often overcast even when inland parts of San Diego County are already bright and warm.
Overcast daylight has two traits worth understanding. First, it is diffuse. Clouds scatter the light so it arrives from the whole sky rather than from one direction, which means there are almost no shadows but also very little punch. A window that floods a counter on a clear day may leave that same counter dim under the marine layer. Second, cloudy daylight reads as cool and slightly blue. Paint colors, wood cabinets and stone counters can look flatter and grayer than they do in a showroom.
What this means in practice is that a Carlsbad kitchen cannot count on its windows to do the morning work for a good part of the year. Electric light has to carry the room at breakfast, and it has to do so without feeling harsh against that soft gray backdrop.
Evening Sun Brings the Opposite Problem
Many homes in Carlsbad, especially those on the west side of El Camino Real or on hillsides with an ocean view, have windows that face toward the water. Late in the day those openings let in low, warm, raking light. It can be beautiful, but it also creates glare on glossy counters, bright hot spots on the floor and deep contrast between the sunlit side of the room and the far wall.
When the sun is low and strong, the instinct is often to switch on every fixture to even things out. That rarely helps, because a ceiling full of cool white light fighting warm sunset light makes the room look patchy. The better approach is a plan where you can raise light in the darker zones only, at a warmth that sits comfortably beside the evening glow.
Building the Three Layers
Lighting designers usually describe kitchen light in three layers. Each one has a separate job, and each should be on its own control so you can mix them to match the hour.
General light for moving around
The first layer fills the room so you can walk through it, find things in the pantry and see who is at the table. In most remodels this means a grid of recessed lights in the ceiling, sometimes paired with a flush or semi-flush fixture in a breakfast nook. On a gray morning this layer does a lot of the lifting, so it should be able to reach a fairly high output. At night, though, it is usually the layer you want lowest.
Task light for the counters
The second layer puts light right where hands are working. Under-cabinet lighting is the classic choice here, usually an LED strip light or a slim linear bar tucked behind the front lip of the upper cabinets. Because it sits close to the counter, it lights the cutting board without casting the shadow of your own head, which is what happens when the only source is a ceiling fixture behind you. Pendant lights over an island serve a similar purpose for the prep or seating area there.
Accent light for depth
The third layer adds interest: light inside glass-front cabinets, a strip along the top of tall cabinets, or a low glow at the toe kick. On a dark winter evening or late at night, this layer alone can be enough to cross the room for a glass of water. It also softens the contrast when strong evening sun lights only one side of the space.
Controls Matter as Much as Fixtures
Three good layers on a single switch defeat the purpose. Each layer should have its own control, and in most cases each should be on a dimmer. Dimming lets the general light run near full on a June Gloom morning, then drop to a low level during dinner while the task and accent layers stay on.
Several points help when planning controls:
Match dimmers to the fixtures. LED fixtures and LED drivers need compatible dimmers. A mismatch can cause flicker, buzzing or lights that never fully turn off. Check the fixture maker's compatibility guidance before the switches are bought.
Put switches where people enter. A kitchen with doorways at both ends, or an open plan that connects to a family room, often benefits from a three-way switch so the general light can be turned on or off from either side.
Choosing Color Temperature for Gray Mornings and Gold Evenings
Color temperature describes how warm or cool white light looks, and it is listed on fixtures in kelvin. Lower numbers look warmer and more amber; higher numbers look cooler and bluer. Many kitchens land in the warm white to neutral white range.
For a Carlsbad home, a reasonable approach is to keep all fixtures in the room at the same color temperature so nothing clashes, and to choose a value that feels comfortable both against the cool marine layer and next to warm sunset light. Very cool settings can make an overcast morning feel even grayer and can look clinical at night. Very warm settings can make white cabinets look yellow at midday.
Some fixtures now offer warm dimming, which shifts toward amber as the light is turned down, much like an old incandescent bulb.
Color rendering index is the other number worth reading. It describes how faithfully a light source shows colors compared with natural light. A higher rating makes food, wood tones and stone look truer. In a room where daylight is often muted by clouds, a high color rendering index helps the electric light show finishes as they were meant to look.
Neighborhood Differences Across Carlsbad
The housing stock varies widely, and that affects lighting plans.
Cottages in Carlsbad Village and Olde Carlsbad often have smaller windows and lower ceilings. They tend to stay dimmer on marine layer mornings, so the general and task layers matter more. Low ceilings also limit pendant choices and push toward slim recessed fixtures or close-mounted lights.
Tract homes from the 1970s and 1980s in La Costa and Calavera Hills commonly have a single central ceiling fixture or an old fluorescent box. Remodels there usually start by replacing that one source with a real layered plan.
Newer homes in Aviara, Rancho Carrillo and Bressi Ranch often have taller ceilings, larger windows and open kitchens that flow into family rooms. These spaces can swing from very bright to quite dim as the sun moves, so separate zones for the kitchen and the adjoining living area are especially useful.
Placing Fixtures to Work With the Windows
Daylight and electric light should complement each other. A few placement habits help:
Map where the window light falls at different times. Note which counters stay dark on a gray morning and which get blasted at sunset.
Put the strongest task light on the counters farthest from the windows, since they lose the most under overcast skies.
Wire the recessed lights nearest the windows on a separate dimmer from those deeper in the room. On a bright evening you can leave the window row off and light only the far side.
Use matte or diffused under-cabinet fixtures over polished stone to cut reflected glare, which is worse when low sun is already bouncing off the surface.
Avoid placing a pendant directly in the line of sight between the island seating and an ocean view window, so the fixture does not compete with the view at sunset.
A Room That Fits the Day
The goal is a kitchen that feels bright and inviting at seven on a June Gloom morning and calm and comfortable at seven on a clear evening with the sun sinking over Carlsbad State Beach. Separate layers, a dimmer on each, a single consistent color temperature and fixtures placed with the windows in mind are what make that possible. Planned this way, the lighting adapts to the coast rather than fighting it.
Yes, that big rectangle of frosted plastic on the kitchen ceiling can come out, and in most cases the ceiling behind it can be made to look as if it was never there. The dropped fluorescent light box is one of the most recognizable features of kitchens built in Carlsbad during the 1970s and 1980s, and it is one of the first things homeowners in Calavera Hills and La Costa ask about when they start planning a remodel. The real questions are what is hiding above it, what should go in its place, and how much ceiling work the job involves.
Why So Many Older Kitchens Have These Boxes
When large tract neighborhoods spread across North County in those decades, fluorescent tubes were an inexpensive way to light a kitchen brightly with one fixture. Builders often framed a shallow recessed tray or a dropped wooden box in the ceiling, lined it with tube fixtures and covered it with translucent acrylic panels. The result was bright, even light from a single switch.
Decades later those boxes show their age. The panels yellow and become brittle, dead insects collect inside, the tubes hum or flicker, and the light itself tends to be cool and unflattering. The ballasts that drive older tubes can fail, and replacement parts for very old fixtures are getting harder to find. Just as important, one central source lights the middle of the room while leaving the counters along the walls in your own shadow.
What You Usually Find Above the Panels
Before anyone designs the new lighting, it pays to lift a panel and look. Common findings in La Costa and Calavera Hills kitchens include:
A framed recess. Many boxes sit in a cavity a few inches deep built between the ceiling joists, with drywall or wood around the sides. Removing the box leaves a rectangular hole in the ceiling plane.
A dropped soffit. Some boxes hang below the ceiling in a built-out wooden frame. Removing these leaves the original ceiling above, sometimes unfinished.
Several fixtures on one feed. The tube fixtures are often wired in a chain from a single supply, which then has to be rerouted or ended properly.
Older ballasts. Very old fluorescent ballasts may contain materials that call for careful handling and proper disposal. Local hazardous waste programs in San Diego County can advise on what to do with them, and an electrician will know how to identify them.
Attic access above. In single-story homes, the attic sits right over the kitchen ceiling, which makes running new wiring much easier. Two-story homes with a bedroom above are more involved.
Option One: Recessed Lights Across the Whole Ceiling
The most popular replacement is a grid of recessed lights spread across the room. Instead of one bright patch in the center, the light is distributed so the perimeter counters get their share. Fixtures are typically set a short distance out from the face of the upper cabinets so the beam lands on the front edge of the counter rather than on the cabinet doors.
Modern options include slim wafer-style LED fixtures that need very little depth above the ceiling and traditional housings with separate trims. In a single-story Calavera Hills ranch with attic access, either type can usually be installed by cutting small openings and fishing wire through the attic. Where the ceiling is insulated, the fixtures must be rated for contact with insulation, and many slim LED models are.
With recessed lights doing the general work, the old box opening becomes a patch job rather than the focal point of the room.
Option Two: A Flush or Semi-Flush Fixture
Some homeowners prefer a single decorative fixture in the middle of the ceiling, perhaps paired with a few recessed lights near the counters. A flush or semi-flush light suits lower ceilings and keeps the look simple. It still needs a proper junction box at its location, attached to framing and rated to carry the fixture's weight, rather than being hung from the old fluorescent wiring.
Option Three: Keep the Recess, Change Its Purpose
Occasionally the framed recess is deep and well built enough to keep as a feature. It can be finished smooth, painted and lined with a concealed LED strip light along its inner edge to create a soft cove glow toward the ceiling. Recessed lights then handle the task work. This is less common, but it can save patching and give a 1980s kitchen a deliberate architectural detail.
Patching the Ceiling After the Box Comes Out
The ceiling repair is often what homeowners worry about most, and it is usually more manageable than expected. A typical sequence goes like this:
The power is shut off at the panel and confirmed dead at the fixture before anything is disconnected.
The panels, tubes, fixtures and ballasts are removed, and the supply wiring is either ended in an accessible junction box or extended to feed the new layout.
Any wood framing that formed the box is taken out, and blocking is added between joists so new drywall has something to fasten to at the edges.
New drywall is cut to fit the opening, screwed in place, taped and coated with several thin layers of joint compound.
The ceiling texture is matched. Many homes from this era have a sprayed or knockdown texture, and blending a patch into it takes some skill.
The whole ceiling is primed and painted so the patched area does not show a different sheen.
One caution deserves its own mention. Some textured ceilings applied before the 1980s contained asbestos. If the kitchen ceiling has a popcorn or acoustic texture and the house dates from that period, have a sample tested before cutting or sanding. Testing is straightforward, and the result determines whether the work needs special handling.
Adding Task Lighting at the Same Time
Taking out the fluorescent box is a natural moment to add light where the old setup never reached. Under-cabinet lighting along the upper cabinets makes the biggest single difference for cooking. Slim LED strips or linear bars tuck behind the cabinet face frame and light the counter directly. Their drivers should sit somewhere reachable, such as inside an upper cabinet or above it, not buried in a finished wall.
If the kitchen has a peninsula or island, a pair of pendant lights over it adds both task light and character. Low ceilings in many tract homes call for compact pendants hung with enough clearance for people to see across the room.
Switching the New Layout
The original box usually ran from one wall switch. The new plan works best with separate controls for each group of fixtures: the recessed grid on one dimmer, under-cabinet lights on another, pendants on a third. Kitchens in Calavera Hills and La Costa often have two entries, one from the garage or hall and one toward the family room, and a three-way switch lets the main lights be controlled from either doorway.
Dimmers need to be compatible with the LED fixtures chosen. Selecting fixtures and dimmers together avoids flicker and buzzing after the walls are closed.
Light Quality Compared With the Old Tubes
Many people who grew up under fluorescent kitchen light remember it as cold and greenish. Modern LED fixtures let you choose the color temperature, so the new light can be a warm or neutral white that suits wood cabinets and stone. A high color rendering index rating makes food and finishes look natural, which is a clear step up from older tubes.
Permits and Inspections
Rewiring a kitchen ceiling usually counts as electrical work that requires a permit under local building codes. The City of Carlsbad handles permits for homes within city limits, and an inspector typically checks the wiring before the ceiling is closed. If the home is in a planned community with an association, interior lighting changes rarely need association approval, though noise and work-hour rules may apply during construction.
Planning Order for a Smooth Job
The cleanest results come when the work happens in a sensible order. Settle on the cabinet layout first, since fixture positions depend on where counters and uppers will be. Then plan the recessed grid, task lights and switch locations together. Run the wiring and pass the rough inspection, patch and texture the ceiling, paint, and only then hang the trims and pendants.
A Better Ceiling for an Older Home
Removing a dropped fluorescent box is one of the most visible improvements available in a Carlsbad kitchen from the 1970s or 1980s. With the box gone, a smooth ceiling, a spread of recessed lights and proper under-cabinet lighting make the room feel larger, warmer and far more useful. In homes across Calavera Hills, La Costa and similar North County neighborhoods, it is often the change that makes an older kitchen finally feel current.
A common assumption among people who buy an older beach cottage is that the kitchen remodel is mostly about cabinets, counters and tile, and that the electrical side amounts to swapping a few outlets. In the small houses of Olde Carlsbad and Carlsbad Village, that assumption tends to fall apart once the walls are opened. A kitchen built decades ago for a refrigerator, a range and a toaster is now expected to power a dishwasher, a microwave, a garbage disposal, an induction cooktop, a coffee maker, an air fryer and a row of phone chargers, often all at once on a Sunday morning. The wiring behind the plaster was never sized for that.
This guide explains, in general terms, what usually needs attention when an older Carlsbad cottage kitchen is brought up to modern demands: the wiring itself, the number of circuits, the outlets along the counters, the main panel and the inspection process. It is meant to help homeowners understand the conversation with a licensed electrician, not to replace one.
The Cottages and Why Their Wiring Varies So Much
The older blocks west of Interstate 5, between Buena Vista Lagoon and Agua Hedionda Lagoon, hold a mix of early beach cottages, small postwar houses and later additions. Many have been remodeled piecemeal over the years, which means one cottage may contain several generations of wiring side by side. A kitchen might have original circuits feeding the ceiling light, a later run added for the refrigerator, and a newer branch someone installed during a past update.
Types of wiring found in homes of this age can include older cloth-insulated cable, early plastic-sheathed cable without a separate ground wire, and occasionally much older systems in the very earliest houses. Ungrounded circuits are especially common. The two-slot outlets you sometimes still see in a cottage kitchen are a visible clue that the circuit behind them has no ground.
Signs the Kitchen Wiring Has Reached Its Limit
Before the remodel begins, a few everyday symptoms suggest the existing system is overloaded or outdated:
Breakers trip, or fuses blow, when the toaster and microwave run together.
Lights dim noticeably when the refrigerator compressor starts.
Outlets feel warm, look scorched or hold plugs loosely.
Extension cords and power strips have become permanent fixtures on the counter.
There are long stretches of counter with no outlet at all.
The panel still uses screw-in fuses, or carries a brand that electricians frequently recommend replacing.
Salt air adds one more local factor. Homes a few blocks from Carlsbad State Beach are exposed to a damp, salty marine atmosphere much of the year, and over decades that can corrode exposed terminals, older outlet hardware and connections in panels located on exterior walls or in garages. An electrician opening up a cottage near the water will often find more corrosion than in a comparable inland house.
Circuits: Why a Modern Kitchen Needs More of Them
The biggest structural change in a cottage kitchen upgrade is usually the number of circuits. Older kitchens commonly ran several rooms off one or two circuits. Current building codes generally call for kitchens to have their own dedicated circuits for counter outlets and for major fixed appliances.
In broad terms, a remodeled kitchen often ends up with:
At least two circuits serving the counter outlets, so heavy small appliances can be spread out.
A dedicated circuit for the refrigerator in many layouts.
Separate circuits for the dishwasher and the disposal, or a shared arrangement the local code allows.
A dedicated circuit for a built-in microwave or a microwave hood.
A heavy, higher-capacity circuit for an electric range, wall oven or induction cooktop.
A lighting circuit for recessed lights, pendant lights and under-cabinet lighting.
The exact requirements depend on the appliances chosen and the code edition the city enforces, which is why the appliance list should be settled early. Switching from a gas range to induction, for example, can add a large new load that affects everything upstream.
Outlets Along the Counters
In a small cottage kitchen, counter space is precious, and outlet planning makes a real difference in how usable it feels. Codes generally require outlets spaced along the countertop so that no point on the counter is too far from one, plus outlets on islands and peninsulas in many cases.
Counter outlets near water also need ground-fault circuit interrupter protection. A GFCI device constantly compares the current going out on one wire with the current coming back on the other and cuts power almost instantly if it detects a leak, such as current flowing through a person. In a kitchen this protection is standard for counter receptacles, and newer code editions have extended it to more locations. Some kitchens also require arc-fault protection, which watches for the erratic electrical signature of a damaged wire or loose connection.
Placement details worth discussing during design:
Outlets near where the coffee maker, mixer and toaster will actually live.
A spot for charging phones and tablets away from the sink and stove.
Whether outlets go in the backsplash, under the upper cabinets or in a plug strip hidden beneath them.
The Main Panel
All those new circuits have to come from somewhere. Many older Carlsbad cottages still have a small main panel with limited capacity and few open spaces for breakers. When a kitchen remodel adds several dedicated circuits plus a large cooking appliance, the electrician will usually perform a load calculation to see whether the existing service can carry it.
The outcome falls into a few general paths. Sometimes the panel has room and capacity, and new breakers simply go in. Sometimes a subpanel near the kitchen is added to provide more breaker spaces. In other cases the whole service needs upgrading, which may involve the utility and a new meter connection. A service upgrade takes coordination and time, so it is worth learning early whether one is needed.
Lighting in a Cottage Kitchen
Cottages often have low ceilings, small windows and a single overhead light. On marine layer mornings during May Gray and June Gloom, these rooms can be quite dark. A remodel is the time to add recessed lights where ceiling depth allows, under-cabinet lighting along the counters and perhaps a pendant light over a small table or peninsula.
Low ceilings and shallow joist spaces favor slim LED wafer fixtures. Plaster ceilings in older homes take more care to cut than drywall. Every splice should end up inside an accessible junction box, and switches can be grouped at the main kitchen entry with a three-way switch added if the room has a second doorway to a porch or dining area.
Opening Walls in an Older House
Running new circuits often means opening plaster or drywall. A few cautions apply to houses of this age:
Paint applied before the late 1970s may contain lead, so cutting or sanding old painted surfaces calls for lead-safe work practices under federal rules.
Some older materials, including certain plasters, textures and insulation, may contain asbestos and should be tested before disturbance.
Abandoned old wiring is sometimes left inside walls. It should be identified and properly disconnected so it is never mistaken for a live circuit.
Framing in cottages is not always standard, so routes for new cable may need to be planned around blocking, old chimneys or earlier repairs.
Permits and Inspections
New circuits, panel changes and most kitchen rewiring require an electrical permit from the City of Carlsbad. Inspections typically happen at two stages: a rough inspection while the walls are open and the wiring is visible, and a final inspection once devices and fixtures are installed. Some Olde Carlsbad properties may have historic character, and while interior electrical work is rarely affected, exterior changes such as a relocated meter could involve extra review.
Keeping the permit and inspection records is worthwhile. They document that the work was done properly, which helps when the house is eventually sold and reassures future buyers who might otherwise wonder about old wiring.
Sequencing the Work
The smoothest cottage kitchen projects in Carlsbad Village and Olde Carlsbad tend to follow the same rhythm. Choose appliances first, since their loads drive circuit and panel decisions. Settle the cabinet layout so outlets and lights land in the right spots. Have the electrician assess the panel and existing wiring. Pull the permit, run the rough wiring, pass the rough inspection, close the walls, then install devices and fixtures and pass the final.
Keeping the Charm While Modernizing
None of this means a cottage has to lose its character. Vintage-style switch plates, period-looking pendant lights and outlets placed discreetly under the cabinets can sit comfortably beside original windows and trim. The point of the electrical upgrade is that it disappears: the toaster and kettle run together without tripping anything, the counters are bright, every outlet is protected, and the panel has room to spare. In an Olde Carlsbad beach cottage, that quiet reliability is what makes a modern kitchen possible inside an older home.